이번글은 스토리보드 대신 코드로 작성할 때
내비게이션 바의 모양 및 기타 설정 관련한
일종의 Cheat Sheet을 써보겠습니다.
설명은 이전글 [iOS/Swift] UINavigationController 살펴보기 를 참고해 주세요.
1. UINavigationController 생성 방법
UINavigationBar를 사용하기 위해선
일단 UINavigationController를 생성해야 됩니다.
SceneDelegate에서 작성
      <swift>


      func scene(_ scene: UIScene, willConnectTo session: UISceneSession, options connectionOptions: UIScene.ConnectionOptions) {

    guard let windowScene = (scene as? UIWindowScene) else { return }

    let window = UIWindow(windowScene: windowScene)

    let mainViewController = ViewController()
    let navigationController = UINavigationController(rootViewController: mainViewController)

    window.rootViewController = navigationController
    // window를 표시하고 Key window로 설정(window를 앞으로 배치)
    // key window: window가 여러개 존재할 때, 가장 앞쪽에 배치된 window를 `key window`라고 지칭
    window.makeKeyAndVisible()

    self.window = window
}
2. UINavigationBar 생성
앱의 상단의 특정 영역에 생성되는 UI 요소입니다.
2.1. UINavigationBarAppearance 설정

      <swift>


      let appearance = UINavigationBarAppearance()

// configureWith_______ : 그림자 값을 생성한다

// 반투명한 그림자를 백그라운드 앞에다 생성 (반투명한 그림자를 한겹을 쌓는다)
appearance.configureWithDefaultBackground()
// 불투명한 색상의 백그라운드 생성 (불투명한 그림자를 한겹을 쌓는다)
appearance.configureWithOpaqueBackground()
// 그림자 제거하고 기존의 백그라운드 색상을 사용 (그림자를 제거하고 기존 배경색을 사용)
// 👉 참고로 그림자를 제거하면 네비게이션 바 아래의 선을 제거할 수 있다.
appearance.configureWithTransparentBackground()
⭐️ 만약 UINavigationBarAppearance에서 standard, compact, scrollEdge 사용 시
색상 및 폰트 변경을 하려면 appearance로 접근하여 변경해 줘야 값이 적용됩니다. ⭐️
      <swift>


      let appearance = UINavigationBarAppearance()

// 기본 내비게이션 바 (위로 스크롤 할 때 백그라운드 그림자 생성)
UINavigationBar.appearance().standardAppearance = appearance
// 컴팩트하게 만듬?!
UINavigationBar.appearance().compactAppearance = appearance
// 큰 타이틀 일 때 동작함 (라지 타이틀일 때 그림자 생성)
UINavigationBar.appearance().scrollEdgeAppearance = appearance
2.2. 기본 배경 및 버튼 색상
      <swift>


      // 이 코드는 UIBarAppearance를 사용중일 때 적용 가능합니다.
// (standardAppearance, scrollEdgeAppearance 같이 사용해주기)

// 전체 공간의 색상을 한방에 변경가능
appearance.backgroundColor = .gray
// 배너 이미지를 넣고 싶을 때 (scrollEdgeAppearance 와 같이 사용해야 함)
appearance.backgroundImage = UIImage(named: "swift.jpeg")
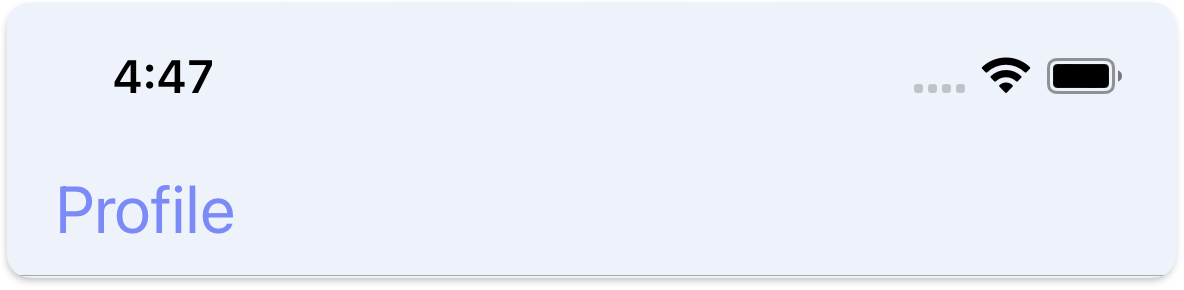
기본 네이게이션 영역의 색상 설정
      <swift>


      // 상태바(시간, 배터리...)이 있는 공간을 불투명(false) or 투명(true)
UINavigationBar.appearance().isTranslucent = false
// 내비게이션 바 직사각형 영역의 색상을 설정
// (만약 여기서 Appearance를 반투명으로 설정하면 위의 그림과 같이 보입니다.)
UINavigationBar.appearance().backgroundColor = .blue
// 위로 슬라이드시 상태바 및 내비게이션 색상 설정
UINavigationBar.appearance().barTintColor = .green
// 탭바 버튼 및 상호작용하는 곳의 색상 설정
UINavigationBar.appearance().tintColor = .red
2.3. 글자 설정
큰 타이틀
      <swift>


      // 라지 타이틀 사용
UINavigationBar.appearance().prefersLargeTitles = true
글자 색상 및 폰트설정
      <swift>


      // 이 코드는 UIBarAppearance를 사용중일 때 적용 가능합니다.
// (standardAppearance, scrollEdgeAppearance 같이 사용해주기)

// 기본 글자 색상 선택
appearance.titleTextAttributes = [NSAttributedString.Key.foregroundColor: UIColor.orange]
// 큰 타이틀 사용시 색상 선택
appearance.largeTitleTextAttributes = [NSAttributedString.Key.foregroundColor: UIColor.orange]
기본 네비게이션바 글자 설정
      <swift>


      // 기본 글자 색상 선택
UINavigationBar.appearance().titleTextAttributes = [NSAttributedString.Key.foregroundColor: UIColor.orange]
// 큰 타이틀 사용시 색상 선택
UINavigationBar.appearance().largeTitleTextAttributes = [NSAttributedString.Key.foregroundColor: UIColor.orange]
참고. NSAttributedString.Key에서 사용할법한 속성들
      <swift>


      [NSAttributedString.Key
    // 폰트 스타일 및 사이즈
    .font: UIFont.boldSystemFont(ofSize: 20.0),
    // 글자 색상
    .foregroundColor: UIColor.blue,
    // 글자 배경 색상
    .backgroundColor: UIColor.systemGreen]
3. Cheat sheet
위로 슬라이드시 내비게이션바의 밑줄(선)을 제거하고 싶을 때
      <swift>


      // 빈 이미지를 만들어서 넣어주면 선을 제거할 수 있다.
UINavigationBar.appearance().setBackgroundImage(UIImage(), for: .default)
UINavigationBar.appearance().shadowImage = UIImage()
다른 뷰 컨트롤러에서 큰 타이이틀을 쓰고 싶지 않을 때 or 큰 타이틀만 쓸 때
      <swift>


      // 다른 컨트롤러에 접근해서 never 설정
self.navigationItem.largeTitleDisplayMode = .never
      <swift>


      // 항상 큰 타이틀로 유지
self.navigationItem.largeTitleDisplayMode = .always
검색창 항상 위
      <swift>


      // 검색창 항상 위
self.navigationItem.hidesSearchBarWhenScrolling = false
탭바 아이템 생성 (우측 버튼)
      <swift>


      navigationItem.rightBarButtonItem = UIBarButtonItem(image: UIImage(systemName: "sun.min"),
                                                            style: .plain,
                                                            target: self,
                                                            action: #selector(tabBarButtonTapped))
뒤로 가기 버튼 제거 (좌측 상단 back 버튼)
      <swift>


      // NavigationItem back 버튼 숨기기
navigationItem.hidesBackButton = true
다른 하나의 컨트롤러에서 내비게이션바를 숨기고 싶은 때
Life Cycle을 통해 관리를 해줍니다.
      <swift>


      // 뷰컨이 생길 때 숨김
override func viewWillAppear(_ animated: Bool) {
    super.viewWillAppear(animated)
    self.navigationController?.isNavigationBarHidden = true
}
// 뷰컨이 사라질 때 다시 동작
override func viewWillDisappear(_ animated: Bool) {
    super.viewWillDisappear(animated)
    self.navigationController?.isNavigationBarHidden = false
}
네이게이션 타이틀 위치 조정 (왼쪽 끝)
titlePositionAdjustment를 통해 타이틀을 움직일 수 있습니다.
      <swift>


      let appearance = UINavigationBarAppearance()
appearance.titlePositionAdjustment = UIOffset(horizontal: -(view.frame.width/2),
                                              vertical: 0)
아마 이 정도면 대략적인 모양 구현은 대부분 가능할 거 같네요.
참고로 저는 보통 extension으로 묶어 사용합니다.
      <swift>


      extension UINavigationController {
    func setupBarAppearance() {
        let appearance = UINavigationBarAppearance()
        appearance.configureWithDefaultBackground()
        appearance.backgroundColor = .gray

        appearance.titleTextAttributes = [.font: UIFont.boldSystemFont(ofSize: 18.0),
                                          .foregroundColor: UIColor.orange]
        appearance.largeTitleTextAttributes = [.font: UIFont.boldSystemFont(ofSize: 35.0),
                                               .foregroundColor: UIColor.orange]

        navigationBar.standardAppearance = appearance
        navigationBar.compactAppearance = appearance
        navigationBar.scrollEdgeAppearance = appearance
        navigationBar.isTranslucent = false
        navigationBar.tintColor = .red
        navigationBar.prefersLargeTitles = true
    }
}
      <swift>


      let navigationController = UINavigationController(rootViewController: mainViewController)

navigationController.setupBarAppearance()
부족한 설명이지만, 조금은 이해 가셨나요?
틀린 내용이 있다면 언제든지 지적해 주시면 감사히 받겠습니다. 🫠
읽어주셔서 감사합니다 😃
4. 참고
UINavigationBarAppearance and proper view/model separation.
'UIKit > Swift' 카테고리의 다른 글
| [iOS/Swift] 디버깅을 통해 메모리 누수를 찾아보자(Debug, Memory Leaks) (0) | 2023.02.17 |
|---|---|
| [iOS/Swift] MVVM 패턴의 Data Binding에 대해서 알아보자! (Closure, Observable, Combine) (0) | 2023.02.14 |
| [iOS/Swift] UINavigationController 살펴보기 (0) | 2023.02.06 |
| [iOS/Swift] 델리게이트 패턴 (Delegate) (0) | 2022.12.23 |
| [iOS/Swift] UITextField 설정 (0) | 2022.12.20 |